Powered By Blogger
Showing posts with label dried oregano. Show all posts

Thursday, December 4, 2014

Zuppa de Fagioli

I created this simple and flavourful soup using ingredients almost solely from our CSA box from "Cooper's CSA Farm & Maze"!  This is considered a peasant soup in Italy and is often passed over for the more popular minestrone, however I urge you to try it.  Not only is this nutritious and easy to create, it is colourful  and flavourful!!

ZUPPA DE FAGIOLI
Ingredients:
2 - 14oz cans of low-sodium cannellini beans (you can substitute white kidney beans)
1 tbsp. EVOO
I leek (white and light green parts), trimmed, sliced in half, cleaned and thinly sliced
2 garlic cloves, crushed
1 tsp fresh thyme leaves (or 1/2 tsp dried)
1/2 tsp dried oregano
2 celery stalks, diced
1 carrot, diced
2lbs spinach, trimmed and roughly chopped (you can substitute kale or Swiss chard)
2 ripe tomatoes, diced
4 cups low-sodium vegetable or chicken stock
Salt and pepper to taste
1/4 cup Parmesan cheese (optional)
  • Put 1 can of beans with its liquid in a blender or food processor, and process until smooth.  Drain and rinse other can of beans.
  • Heat oil in a heavy bottomed pot over medium heat.  Add leek, garlic, thyme and oregano.  Cook for 2 to 3 minutes, or until the leeks are soft.  Add celery, carrot, spinach and tomato; cook for a further 2 to 3 minutes, or until spinach is wilted.
  • Stir pureed beans and stock into vegetable mixture.  Bring to a boil, then reduce heat to medium low and simmer for 5 to 10 minutes, or until vegetables are tender.
  • Add drained beans and stir until heated through.  Season to taste with salt and pepper.
  • Serve in warm bowls topped with grated Parmesan cheese.
  • ENJOY!

Sunday, August 24, 2014

Tomato & Olive Antipasto


One of my favourite preserves of each summer is this recipe for tomato & olive antipasto.  I tried it years ago from the book "The Complete Book of Pickling" by Jennifer MacKenzie, and have made it yearly ever since!  It is a fair amount of dicing, but well worth it in the end. Naturally you don't necessarily need to preserve this antipasto and can make it and keep it in the fridge, but the wonderful summer flavours will last longer if canned!  This tastes amazing with rich cheeses and cured meats such as salami!
8oz wide-mouthed jar fresh from the canner!

TOMATO & OLIVE ANTIPASTO
Ingredients:
10 cups chopped Roma tomatoes (you can peel them but I don't and the texture is fine)
1 1/2 cups finely chopped onions
1 1/2 cups diced red bell peppers
1 cup diced green bell pepper
1 cup diced celery
2 tbsp minced garlic
2 bay leaves
1 cup granulated sugar
1 tbsp pickling or canning salt
1 tbsp dried basil
2 tsp dried oregano
1/2 tsp freshly ground black pepper
1 1/2 cups red or white wine vinegar (I use red for the rich colour it gives)
1/2 cup drained rinsed brine-cured olives, diced or slivered*
  • In a food processor or blender, puree 2 cups (500 mL) of the tomatoes until smooth (alternatively you can use passata).
  • In a large pot, combine pureed and diced tomatoes, onions, red and green peppers, celery, garlic, bay leaves, sugar, salt, basil, oregano, pepper and vinegar.  Bring to a boil over medium-high heat, stirring often to prevent burning on the bottom of the pot.
  • Reduce heat and boil gently, stirring often, for about 2 hours or until the antipasto is reduced by about half and is thick enough to mound on a spoon.
  • Meanwhile prepare canner, jars and lids.
  • Stir olives into antipasto and boil gently, stirring often, for 5 minutes to blend the flavours.  Discard the bay leaves.
  • Ladle hot antipasto into hot jars, leaving 1/2" headspace.  Remove air bubbles by sliding the handle of a spoon into the antipasto, and adjust headspace as necessary.  Wipe rim of jar and place hot disc on jar.  Screw band down until fingertip tight.
  • Place jars in canner and return to a boil.  Process for 20 minutes.  Turn off heat and remove canner lid.  Let jars stand in water for 5 minutes.  Transfer jars to a towel-lined surface and let stand for 24 hours.  Check lids and refrigerate any jars that are not sealed.
  • ENJOY!!
*I find the antipasto sits nicer on a cracker when diced but this is just preference!
**This recipe makes approximately 8 250mL jars or four 500 mL jars

Friday, February 21, 2014

Kale & Quinoa Rolls

I spied this recipe in "Fresh Juice" magazine and decided to whip it up one evening expecting mixed results from the family.  As expected, India didn't even want to try the kale (she only likes it in chip form), but loved the quinoa.  Devon had 3 rolls and Greg and I finished up the rest!!  This is similar to cabbage rolls and I have pictured the dish without the sauce topping the rolls, so you could see how they look in the baaking dish. This is not only super nutritious, but easy and tasty too!

KALE & QUINOA ROLLS
Ingredients:
12 large leaves of kale
2 tsp grapeseed oil
1 onion, diced
1 cup diced mushrooms (I used porcini as they're "meatier" in texture and have great flavour)
1 clove garlic, minced
1 tsp dried oregano
1 tsp dried thyme
1 cup quinoa (rinse to remove the bitter coating called 'saponin')
2 cups low sodium vegetable broth
1 carrot, peeled and diced
1 zucchini, diced
1/4 tsp each salt and pepper
1 large egg, beaten
2 cups no salt added passata di pomodoro (crushed tomatoes)
  • Remove the stems from the kale by grasping the base of the stem in one hand and running the thumb and forefinger up the stem.  It will break off where the stem is more tender.  Discard the stems.  Add kale to a large pot of salted, boiling water.  Cover and cook until the leaves are softened - 2 minutes maximum.  Place leaves in a sieve and run under cool water.  Remove leaves and lay out flat to drain on paper towels.  Set aside.
  • In a saucepan over medium heat, add oil.  Saute onions, mushrooms, garlic, oregano, and thyme for 5 minutes (or until onion is softened)  Stir in quinoa.  Add broth; bring to a boil.  Reduce heat, cover and simmer for approximately 15 minutes or until all the liquid is absorbed.  Stir in carrot, zucchini, salt and pepper.  Let cool to room temperature.  Stir in egg*
  • Preheat oven to 350F.  To assemble the rolls, spoon approximately 1/3 cup of the quinoa mixture onto each kale leaf, just above where the base of the stem would have been.  Fold bottom up over filling, tuck sides in and roll up.  This is quite a bit trickier I found than using cabbage leaves for traditional cabbage rolls.  Take your time!
  • Line the base of a 13"x9" baking dish with half of the passata.  Arrange the kale rolls on top of it and cover with the remaining passata.  Cover the dish with foil and bake for one hour.
  • Remove and ENJOY!

Thursday, September 26, 2013

Easy Slow Cooker Beef Stew

This is the SIMPLEST recipe and it is absolutely DELICIOUS!!!  Before I left for work I started this stew and by dinner time we had an amazing dinner that everyone enjoyed.

EASY SLOW COOKER BEEF STEW
Ingredients:
1 lb stewing beef, cut into 1/2" cubes
1 to 2 tbsp oil (preferably grapeseed or coconut, but olive is fine too!)
28 oz can tomatoes*
2 carrots, sliced
2 ribs celery, sliced
1 small onion, coarsely chopped
1 zucchini diced into 1/2" cubes
4 cups water
1/2 cup red wine
4 beef bouillon cubes**
2 tsp garlic powder (or 2 cloves garlic diced)
1 tsp black pepper
1 tsp dried oregano
1/2 tsp dried thyme
1 bay leaf
1/4 to 1/2 cup couscous (as we don't eat wheat, I used rice pasta, but I am sure quinoa would be lovely too!!)

  • In a skillet, heat oil and brown the beef. Brown in batches to allow for air to circulate around the beef pieces so they brown, rather than steam!
  • Place all vegetables in the slow cooker and add the beef.  Stir to combine.
  • Combine all the rest of the ingredients in a bowl (except couscous) and pour over the ingredients in the slow cooker.
  • Cover.  Cook on low for 6 hours.  Stir in couscous.  Cover and cook for an additional 30 minutes.
  • ENJOY!
*Try for low sodium tomatoes as mine weren't and combined with the bouillon cubes, the stew was on the salty side.
**Homemade stock is best as it generally contains little or no sodium, if using prepared bouillon cubes, opt for low sodium varieties as it isn't impossible to remove the saltiness, but it is more difficult!!

Sunday, January 29, 2012

Almond Flour Pizza Crust (Gluten, Casein, Grains and Yeast Free!!!)

I have joined India and Greg in a rebalancing diet which excludes casein, wheat, refined sugar and yeast - this is a little tricky when it comes to one of my favourite foods - pizza.  Stumped, I decided to surf the web and found this fantastic website by "Ginger Lemon Girl" After reading this recipe I immediately went out and purchased "Bob's Red Mill" almond meal/flour and decided to treat us all to homemade pizza.  It was not only super-easy to create, but has a great texture and taste!!! YAY!  Pizza is back in my diet!!!
ALMOND FLOUR PIZZA CRUST
Ingredients:
2 cups almond flour
1/2 tsp salt
1/4 tsp baking soda
 1 tsp each; dried oregano, garlic powder and dried basil
3/4 cup pureed white beans (I used white kidney but cannellini or navy beans are also good!)
3 eggs
3 tbsp EVOO 

  • Preheat oven to 350F.  Line a 12" round pizza pan or rectangular baking sheet with parchment paper.
  • In a large bowl, mix all dry ingredients together.  In a smaller bowl mix the last three ingredients.  Combine dry and wet ingredients.  The dough is wetter than the average pizza dough, but don't worry!
  • Using a spatula, gently spread the mixture over the pan to a thickness of 1/2" and place in the oven for 10 - 12 minutes, or until edges are lightly browned.
  • Add your choice of toppings and bake for an additional 10 - 15 minutes, or until you toppings are cooked through or melted.
  • ENJOY!!!!

Thursday, January 19, 2012

Braised Sausage with Grapes and Balsamic-Glazed Onions

We all love sausages and I was intrigued by this recipe that I found in Fine Cooking magazine as it uses red grapes.  Unfortunately the package that I had in the fridge had only 5 sausages in it and the recipe called for 8, but it didn't matter!  Pair with garlic mashed potatoes, a salad or kale chips!!!

BRAISED SAUSAGE WITH GRAPES & BALSAMIC-GLAZED ONIONS
Ingredients
2 tbsp olive oil
8 links of sweet Italian sausage, pricked with a fork
1 lrg yellow onion, thinly sliced
1/2 tsp Kosher salt
1/2 cup chicken broth
2 tbsp balsamic vinegar
20 seedless red grapes, halved lengthwise
2 tbsp chopped fresh oregano, or 1 tbsp dried oregano
  • In a large 12" skillet, heat 1 tbsp of olive oil over medium heat.  Add the sausages and cook, turning every few minutes until they are browned all over (approx. 8 minutes).  Transfer to a large plate.
  • Add the remaining 1 tbsp olive oil and the onion to the skillet with the salt, and saute until the onion softens completely and starts to turn light brown.  Add the chicken broth and balsamic vinegar and scrape the bottom of the skillet  to incorporate any browned bits.
  • Reduce the heat to a gentle simmer.  Add the sausages and grapes, cover the skillet with the lid ajar, and cook, stirring occasionally, until sausages are cooked through (approx. 25 mins or cut one to check)
  • Serve sprinkled with oregano and ENJOY!  

Thursday, January 5, 2012

Mediterranean Squares

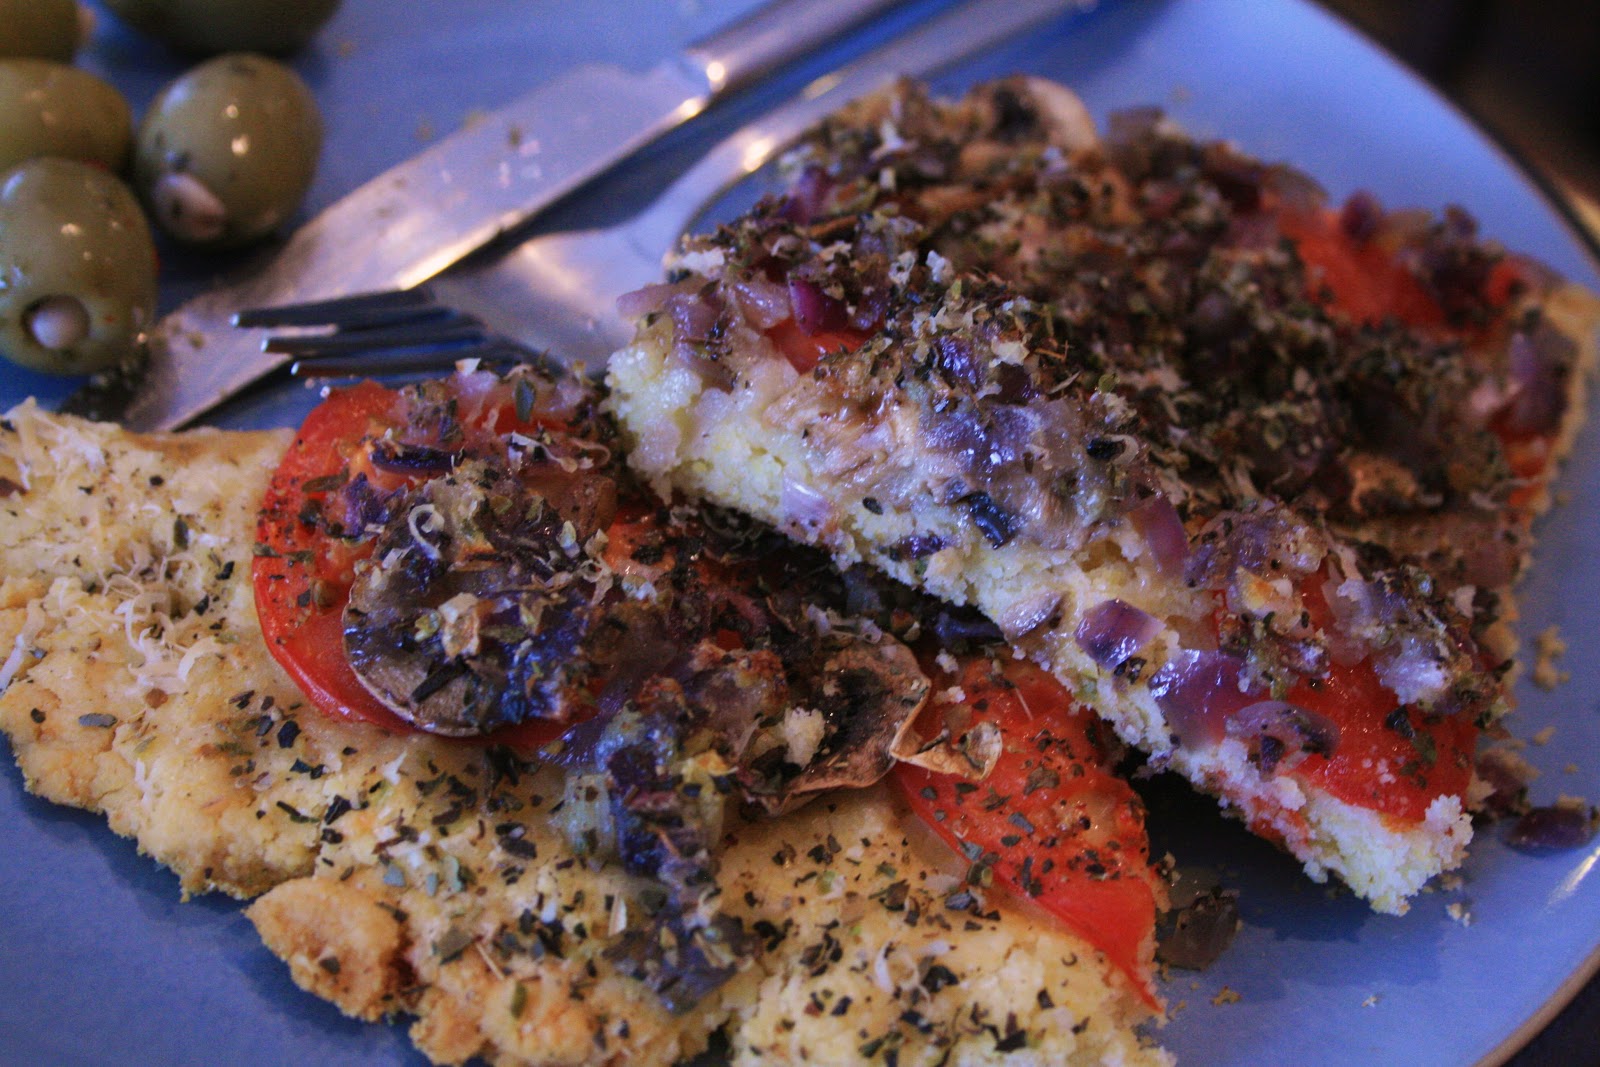
I have had this recipe for 10 years and continue to enjoy it time and again!  My friend Sharon made this for lunch one day when our eldest children were babies and it soon became a staple for gatherings and our various lunches with Siobhan.  It is simple, consists of ingredients that you can find in your pantry and fridge, and takes no time at all to prepare.  The best is that it is just as tasty cut up into small bite-sized squares and eaten cold!
MEDITERRANEAN SQUARES
Ingredients:
(Topping)
1 medium onion, diced
2 garlic cloves, minced
1 tbsp olive oil
Pinch of dried rosemary
1 cup grated mozzarella cheese
2 medium hot house tomatoes, sliced
1 cup sliced mushrooms
1 tsp dried basil 
1/2 tsp oregano
1/4 tsp black pepper
1/2 cup grated Parmesan Reggiano
(Crust)
1/4 cup cornmeal
1 3/4 cups all-purpose flour
1 tbsp baking powder
1 tsp salt
1/3 cup cold shortening (or cold butter)
3/4 cup milk
  • Preheat oven to 425F.  Prepare a rimmed cookie sheet by sprinkling with 2 tsp cornmeal.  Set aside.
  • In a small microwavable bowl, pour olive oil over the garlic and onions and microwave, uncovered at high for 1 minute, or until softened (*I generally place the ingredients in a small pan and saute till softened)
  • In a bowl, combine cornmeal, flour, baking powder, and salt.  Cut in shortening until it becomes coarse crumbs.  Add milk all at once and mix to make a soft, sticky dough.
  • Turn out onto a floured surface and knead approx. 10 times (avoid overworking the dough!)  Roll out to fit pan.
  • Sprinkle mozzarella cheese over the crust.  Arrange tomatoes, mushrooms, and onion mixture on top of the cheese.  Sprinkle with basil, oregano, pepper and Parmesan.
  • Bake in bottom third of preheated oven for 20 minutes, or until cheese is bubbly and crust is browned.  
  • Slide on to a cooling rack and let cool for 5 minutes prior to cutting into squares.
  • ENJOY!
**Since my family cannot really tolerate wheat and dairy, I use gluten free all-purpose flour, coconut oil instead of shortening or butter, almond milk, and goat's cheeses!
  

Sunday, November 20, 2011

Garlicky Lentil Soup

Today is one of those days where the weather keeps changing from dull and rainy to sunny and windy....perfect day for soup in my books!  This is a family favourite that is simple and economical to make. Judy, who is renting our vacation home, sent me these beautiful cloves of her organically-grown elephant garlic.  They are perfect for this soup - thanks Judy!
When I taught a few cooking classes in my home to a friend and her daughter, this turned out to be their family's favourite and they make this soup all the time!  Try it tonight and you won't be disappointed!!
GARLICKY LENTIL SOUP
Ingredients:
1 cup red lentils, rinsed and drained
2 onions, finely chopped
2 large garlic coves, finely chopped
1 carrot, finely chopped
2 tbsp EVOO, avocado or coconut oil
2 bay leaves
A generous pinch of dried marjoram or oregano
6 1/4 cups vegetable stock
2 tbsp red wine vinegar
Salt and freshly ground black pepper, to taste
  • Put all the ingredients except for the vinegar, salt and pepper, in a large heavy-bottomed pot.  Bring to a boil over medium heat, then lower the heat to medium-low or low and simmer for 1 1/2 hrs, stirring occasionally to prevent the lentils sticking to the bottom of the pot.
  • Remove the bay leaves and add the red wine vinegar, salt and pepper.  If the soup is too thick for your liking, thin it with a little extra vegetable stock or water.
  • ENJOY!  

Monday, August 29, 2011

Leftover Mashed Potato Muffins

These savoury muffins and a nice breakfast treat, or with soups, stews or chilis!  Next time  you are making mashed potatoes for dinner, try throwing in a couple of extra potatoes so you'll have leftovers to create these tasty treats!
LEFTOVER MASHED POTATO MUFFINS
Ingredients:
2/3 cup all-purpose flour
1/4 cup cornmeal
4 tsp granulated sugar
3/4 tsp salt
1/4 tsp each ground black pepper & dried oregano
2 eggs
1 cup mashed potatoes
1/3 cup milk
1/4 cup minced green onions (I use garlic scapes!)
1/2 cup finely minced red bell pepper
  • Preheat oven to 400F.  Grease muffin cups; set aside.   
  • In a large bowl, whisk flour, cornmeal, sugar, salt, pepper and oregano together.  In a separate bowl, whisk eggs, potatoes and milk until fairly smooth.  Pour over dried ingredients.
  • Add green onions and red peppers to the bowl and mix until ingredients are just combined.  Spoon into prepared muffin cups.
  • Bake in centre of the oven for 15 mins (or until a toothpick inserted into the centre of one muffin, comes out clean).
  • Transfer muffins to a cooling rack and let cool.
  • Enjoy with butter while still slightly warm, or with your favourite soup, stew or chili!!!


Tuesday, September 7, 2010

Tomato-a-rama!!!


It's that time of year again when all the tomatoes are at the peak of ripeness, and I start my sauce-making (much to my son, Devon's delight!) Of course I chose one of the hottest days to go over to "Cooper's CSA Farm & Maze" and pick the lovely San Marzano tomatoes that Steve Cooper has grown specifically for sauce-making...my friend Kathy and I nearly died! Hours later, the tomatoes on the bottom of the bushel basket were still warm from the sun's rays!
I am fairly new to the sauce-making game and since my son is pretty much a purist, I tend to make a basic sauce to which I can add roasted garlic, fresh herbs, sauteed ground beef, etc. to depending on what recipe I am using the sauce for. We ran out of my homemade sauce fairly early in the season and so I decided that I would make a whole bushel-worth of sauce and then go over this week to pick another half bushel for diced tomatoes....I got 11 Litre jars and one 500mL jar out of the bushel.
Here are some tips that I have picked up on the way and am passing on to you budding sauce-makers out there!
  1. Get a pot of water to a rolling boil, cut an "x" in the bottom of each tomato and drop them into the pot. (I found that these tomatoes needed to be in the boiling water for 3 to 5 mins. to make the skins peel off easily).
  2. I never seem to have enough ice on hand so when I create my ice bath in the sink, I use the ice packs that I keep in my freezer - they work just as well and are reusable! Keep the tomatoes in the ice bath for at least 3 to 5 minutes so they're cool enough to handle!!!
  3. After peeling the skins off and trimming the stem end, I seed the tomatoes over a sieve which is placed over a large bowl. This way the tomato water from the juicy seeds drips into the bowl. When your tomatoes are in the pot, just add the tomato water to the pot for a super-flavourful sauce!
  4. Instead of transferring hot tomatoes to a blender or food processor, I just use my immersion blender to puree up the tomatoes as they are cooking.
  5. Reduce your tomatoes by half for thick sauce and a 1/3 for thinner sauce. Make sure that you don't have the heat too high otherwise they will scorch to the bottom of the pot. If you feel that it is taking too long or your pot is too full, transfer half the mixture to another pot so the sauce doesn't have to cook for too long and you risk scorching.
  6. BE CAREFUL when you are transferring the sauce into the jars - I gave myself a nasty burn on my hand when some of the sauce splashed back out of the jar....thank goodness for "Traumeel"!!!