Sunday, December 19, 2010

Toasted Spiced Chickpeas

We have all been suffering with colds and flu so I decided it was high time for a spicy meal (trouble was, I really didn't feel like cooking!)  So I decided the pulses are quick and easy to cook, and filling ~ perfect!
My friend Andrea had given me a book last year entitled "Indian Food Made Easy" by Anjum Anand and it is fabulous!!  I got this recipe from her book and ALL of us thoroughly enjoyed them...in fact we had seconds!

TOASTED SPICED CHICKPEAS
Ingredients
2 tbsp vegetable oil
1 tsp cumin seeds
1/2 tsp turmeric powder
1/4 - 3/4 (depending on your taste!) tsp of red chili powder
1 1/4 tsp ground coriander
3/4 tsp garam masala
400g can of chickpeas, rinsed and drained
Salt to taste
2 tbsp boiled water
Handful of fresh coriander leaves, chopped
  • Heat the oil in a large skillet.  Add the cumin seeds and fry for about 30 to 40 seconds, or until they give off their aroma and start to darken.
  • Add the remaining spices and salt and cook for 10 seconds.  Add the chickpeas and stir to coat well in the spices.  Saute for 2 minutes, then add the water and coriander leaves.  Cook for a further minute and serve!
*I didn't have the fresh coriander leaves, but the chickpeas were delicious without it still!*

Minted Bulgur With Pomegranates

I spied this recipe in the latest "Chatelaine" magazine and since I had all the ingredients, thought I would give it a whirl ~ and boy am I glad I did!!!  Not only is this super-easy to put together, but it is chewy and tastes great hot or cold.  Pomegranates are in season now and bulgur is as easy to use as couscous but has far more nutrients!

MINTED BULGUR WITH POMEGRANATES
Ingredients
1 tbsp butter
1 small onion, finely diced
1 cup coarse, uncooked bulgur
1/4 tsp ground cinnamon
1 1/2 cups chicken broth
Zest from one lemon
2 tbsp fresh lemon juice
1/2 cup pomegranate seeds (approx. 1/2 pomegranate)
1/4 cup sliced almonds
2 tbsp chopped fresh mint, or 1 tsp dried
  • Melt the butter in a large saucepan and saute the onion, bulgur and cinnamon for approx. 1 min.
  • Add the chicken broth and bring it to a boil.  Reduce the heat to low and simmer, covered, until all the liquid is absorbed and the bulgur is tender (approx. 15 mins)
  • Stir in the lemon zest and juice with the pomegranate seeds and almonds. 
  • Remove from heat and sprinkle with the mint before serving!
*This dish is delicious both as a side dish warm, or room temperature as a salad!  To remove the pomegranate seeds, simply slice the pomegranate in half lengthwise.  Hold it cut-side down over a bowl and hit the skin side firmly with a wooden spoon.  The seeds will drop right out!!*

Wednesday, December 15, 2010

Slow Cooker Beef Stew

I am having a bit of a love affair with my slow cooker lately!  I just enjoy being able to plop all the ingredients into it, covering the dish and leaving it all day.  When it is dinnertime, VOILA!  Dinner is ready and I'm not spending tons of time in the kitchen (instead I am using it much more effectively by helping the kids do their homework...sigh!) 
This is one of my go-to easy peasy beef stews which has a changeable recipe depending on what root vegetables I have.  Sometimes for kicks I throw in parsnips, sweet potatoes, and turnips!  Experiment with whatever you have in your vegetable bin and try it for yourself!

SLOW COOKER BEEF STEW
Ingredients:
2 lbs stewing beef, in 1/2" cubes
1/2 cup all-purpose flour
 1 1/2 tsp salt
1/2 tsp black pepper
1 tsp paprika
1 tsp Worcestershire sauce
2 cups beef stock
1 garlic clove, chopped or minced
1 bay leaf
4 carrots, diced (or 1 lb bag of whole baby carrots)
2 onions, diced
1 rib celery, diced
3 potatoes diced in 1" cubes
2 cups tomatoes, diced

  • Place meat in the slow cooker. 
  • Combine flour, salt, and paprika in a small bowl.  Stir into meat until coated well.
  • Gently stir in remaining ingredients, combining well.
  • Cover.  Cook on low for 8 to 10 hours, or high for 3 to 4 hours.
  • Stir well before serving and ENJOY!
*I generally prepare this in the morning so I can cook it on low - I just find that this low and slow cooking style makes the beef far more tender than cooking it on high!*

Ginger Chicken Stir-Fry

This is one of those super-easy, mid-week meals that you can get on the table almost faster than it takes the rice to cook!  Also a little ginger at this time of year is always a good idea!!!

GINGER CHICKEN STIR-FRY
Ingredients
Marinade:
1 egg white, beaten
1 tbsp soy sauce
1 tsp cornstarch
1/8 tsp white pepper
1 lb boneless skinless chicken breasts, cut into 1" pieces
Sauce:
1/2 tsp cornstarch
2 tbsp rice vinegar
2 tbsp soy sauce
1 tsp granulated sugar
Stir-Fry:
1 tbsp plus 2 tsp oil, divided (I have been using "Olys" which is derived from cereal grains, but you can use vegetable or peanut oil)
1 medium green bell pepper, julienned
3 green onions, cut into 1" lengths
1/2 cup canned bamboo shoots, finely chopped
3 tsp minced fresh gingerroot
1/4 cup slivered almonds, toasted (I didn't have any almonds this time, but usually add them!)

  • In a large resealable plastic bag, combine the egg white, soy sauce, cornstarch and white pepper.  Add chicken, seal bag and turn to coat.  Refrigerate for 30 mins.
  • Combine the cornstarch, vinegar, soy sauce and sugar until smooth;  set sauce aside.
  • Drain chicken and discard marinade.  In a large skillet (or wok), stir-fry chicken in 1 tbsp oil until no longer pink.  Remove from the pan and set aside.
  • Stir-fry green pepper and onions in remaining oil for 2 minutes.  Add bamboo shoots and ginger; stir-fry 3 to 4 mins. longer or until vegetables are crisp tender.
  • Stir sauce mixture and add to pan.  Bring to a boil; cook and stir for 2 minutes or until thickened. 
  • Add chicken and heat through.  Sprinkle with almonds and stir to combine.  Remove from heat.
  • Serve over warm rice!
*I usually buy my gingerroot when it's on sale in the grocery store and then store it in the freezer so it lasts, is easy to grate using my rasp, and I always have it on hand.  Don't leave it out of the freezer too long though, as it will go mushy!!*

Monday, November 22, 2010

Pumpkin & Chocolate Chip Bundt Cake


My mother-in-law made her own pumpkin pie filling and then brought us a loaf of pumpkin bread that she made!  This inspired me to make my own and I must admit I used canned pumpkin (despite my best intentions to make my own from the pie pumpkins that we got from Cooper's CSA Farm & Maze).  This was such an incredibly easy, delicious and moist cake that we just gobbled it up!!!

PUMPKIN & CHOCOLATE CHIP BUNDT CAKE
Ingredients:
4 eggs
2 cups granulated sugar
1 1/4 cups vegetable oil
1 cup fresh or canned pumpkin
1 tsp real vanilla extract
2 tsp ground cinnamon
1/8 tsp ground cloves or ground allspice
1/4 tsp salt
2 tsp baking soda
2 tsp baking powder
1 1/2 cups whole wheat flour
1 1/2 cups all-purpose flour
1 1/2 cups walnut pieces or chocolate chips

  
  • Preheat oven to 350F degrees. Grease and flour a 10" bundt pan or tube pan.
  • In a large mixing bowl, mix the eggs with a large fork until well blended.  Mix in the sugar. Add the oil in a steady stream, mixing all the while, until the mixture is thick and smooth.
  • Mix in the pumpkin, vanilla, cinnamon, clove and salt. Add the baking soda and baking powder in pinches, breaking up any lumps with your fingers. Stir in thoroughly.
  • Stir in the whole wheat and all-purpose flours just until blended. Stir in the walnuts or chocolate chips.
  • Pour and scrape the batter into the pan and bake for 45 to 50 minutes, or until a tester inserted in the center comes out clean.
  • Cool in the pan on a rack for 10 minutes. Invert, remove the pan, and cool on the rack for about 15 minutes more.
  • ENJOY!

Wednesday, November 3, 2010

Slow Cooker Roast Beef with Carrots & Potatoes

With the cooler weather upon us, I decided to bust-out my slow cooker and give it a work out!  Since I still had quite a few carrots and potatoes from my CSA share, as well as a lovely cross-rib roast of beef in my freezer (also from Cooper's CSA Farm & Maze), I decided roast was on the menu!
The cooking time may seem excessively long, but trust me - even though the roast is technically cooked perfectly after 7 or 8 hours, leaving it to cook until the full 10 really makes it super tender and produces an amazing gravy!
SLOW COOKER ROAST BEEF WITH CARROTS & POTATOES
Ingredients:
2lb cross rib roast
2 to 3 tbsp all-purpose flour
Salt & pepper
1 tbsp EVOO
2 cups of good quality beef stock
2 tbsp Worcestershire Sauce
1 onion, sliced into 1/4" thick slivers
20 small carrots (I approximate 5 per person)
4 - 6 medium sized potatoes scrubbed and cut into 1" chunks with the skin on
  • Wash and pat roast dry.  Combine salt and pepper (to taste) with flour in a bowl.  Heat the extra virgin olive oil (EVOO) over medium-high heat in a large skillet.  While you are waiting for the oil to get to temperature, rub the flour all over the roast.  Place the roast in the skillet and brown all sides.  Remove from heat.
  • In a slow cooker, set on low heat, place the carrots on the bottom of the pot, the roast on top of the carrots and onions all around the meat.  Pour the beef stock and Worcestershire sauce over top. 
  • Cover and set to cooking for 8 hours (resist the temptation to open the lid as this dramatically lowers the temperature...but the aroma is incredible!)  Check periodically to ensure there is enough gravy.  If it seems it is evaporating, add more beef stock in 1 cup increments.
  • Immerse the potatoes in the stock around the roast.  Place the lid back on and cook for another 2 hours.
  • After 10 hrs of cooking on low, switch off the slow cooker and remove the roast. Place on a cutting board to rest.  With a slotted spoon remove the vegetables and keep warm in a serving dish.  Pour the gravy into a small saucepan.  Place over medium-high heat and reduce by half so the gravy thickens a little.
  • Carve the roast and serve on a bed of the roasted vegetables with the rich gravy drizzled over top!
  • ENJOY!
*What we like to do with leftovers is make beef dip sandwiches for dinner the next evening, with sauteed onions!!!  YUMMY!
*For the Brussels sprouts I simply trimmed and sliced them in half, tossed them in olive oil and lemon pepper and placed them on a rimmed baking sheet.  Then they were baked in the oven for 20 mins at 375F,  and turned once halfway through to ensure even roasting.  This is simple and quick (and I have had several requests for my 'recipe' for these Brussels!  LOL!)

Monday, November 1, 2010

Stuff!

I just realized that I haven't posted anything since mid-October...I guess I've been busy! Lately we've been eating a lot of dinners that I have already posted on my blog, so there's nothing new to add, sadly. I have been focusing on my scrapbooking which has been sorely neglected over the summertime while India and Devon were at home, and the early fall when things were super-busy over at Cooper's CSA Farm & Maze! (So technically I haven't been sitting back relaxing - just not catering to my creative outlets as much as perhaps I should!!) A few weekends ago I got together with a group of my girlfriends for a weekend retreat and got a LOT accomplished! I am almost finished my 2009 album in time for 2010 to come to a close :0) My goal for these layouts was to minimize the number of pages that I was having to complete because I had 50 pictures of each event.  Therefore, I now choose better-quality and fewer photos that best show whatever event I am scrapping about! Here are a few pages that I wanted to share...take a look!!!


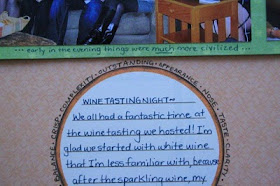
I love the fact that the photos that we took at our wine tasting are as blurry and poorly composed as we all were!!

Even though I wanted this page to be fairly simple as the photos have a lot going on in them, I decided to write all the different "language" that the Sommelier encouraged us to use while tasting, around the journalling area.  I created a circular journalling space to mimic a ring left by a wine glass!

I also decided to add the varieties of wines that we tasted that night (of course I had to refer to the notes we were given because I really don't remember much after the white wines and champagne!!!)


I created this page for my girlfriend's latest baby, Jaxon!  What was cuter than the baby, was that Michelle understood my scrapping needs and dressed herself and Jaxon in similar colours!!!


Just a close-up of the title that I created on my Cricut using the "Cuttin' Up" cartridge and the paper buttons that I backed with foam squares to give a 3D effect!


Who can resist the play on words?!
I decided to do a page devoted to Greg's first car that he ever owned (and he still owns)!!!  BTW, India chose to pose like that all by herself....future auto show girl?!  LOL!


I attempted to recreate a VW symbol using silver card stock - not exact, but not bad!!!

The black ribbon reminded me of a tire tread mark on a road, and I added the purple floral one to tie in with India's boots and floral pattern on her skirt!
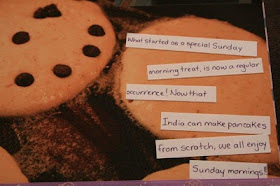
This page is all about India and celebrating the fact that she is now our Sunday morning Chef at breakfast!!  India's favourite are pancakes and she faithfully reproduces them from my "Canadian Living Cookbook" from scratch...of course no pancake is fully dressed without a smile!!

Just a close up of the silver crown that I backed with foam squares and cut out using the Cricut cartridge "Cuttin' Up".  The holographic appliques are repurposed from one of India's old shirts!!

As I wanted the pancakes to be the focus of this page, I decided to print this photo as a 10" x 12".  Then I simply applied white cardstock strips to provide a journalling space!


Saturday, October 16, 2010

Creamy Turkey & Apple Chili

As it is harvest time here and we just had Thanksgiving, I had apples and turkey a-plenty!  This recipe is one that I have made for years and love.  It is deceiving because it appears to be just creamy and bland...but it really packs a lovely heat which is surprising and delicious!!  I made a double-batch for a dinner party we had last night and everyone loved it!!

CREAMY TURKEY & APPLE CHILI
Ingredients:
1/4 cup EVOO
2 lbs of turkey meat, cut into 1/2" cubes
4 tsp chili powder
2 tsp ground cumin
Dash of cayenne (if you like it a little on the hot side!)
Salt & pepper, to taste
2 apples, peeled and cut into 1/2" cubes
1 onion, diced
4 tbsp butter
1/4 cup all-purpose flour
2 cups homemade chicken broth (or turkey)
3/4 cup milk
Two 15oz cans of white kidney beans, chickpeas, or Romano beans, drained and rinsed
2 cups shredded Monterey Jack or Asiago cheese
  • In a large Dutch oven, heat 2 tbsp olive oil over medium-high heat.  Add the turkey, chili powder, cayenne (if using), and cumin.  Season with salt and pepper and cook, stirring, for 5 mins.  Transfer to a bowl.
  • In the same pot heat the remaining 2 tbsp oil.  Add the apples and onion and saute until soft, stirring constantly. Approximately 6 mins.  Add to the turkey mixture.
  • In the same pot, melt the butter over medium-low heat.  Whisk in the flour and cook for 1 minute, stirring constantly.  Whisk in the chicken (or turkey) broth and milk until thickened, approx. 3 mins.
  • Stir in the turkey-apple mixture and beans.  Bring to a simmer, then stir in the cheese.
  • Serve with cornbread muffins, tortilla chips, or crusty bread!
  • ENJOY!!!

Acorn Squash Soup with Bacon

In our CSA boxes we have been receiving a lot of squash lately (which makes me SO happy!)  As I had 3 white acorn squash hanging about I decided to try this recipe which I found on www.allrecipes.com.  All I can say is YUMMY!!!  Greg and I had two full bowls each and the kids gobbled theirs up too.  The bacon isn't necessary, but it did make a nice contrast to the sweet and slightly spicy soup.

ACORN SQUASH SOUP WITH BACON
Ingredients:
1 small onion
1/4 cup chopped celery
2 tablespoons butter or margarine
2 tablespoons all-purpose flour
1 teaspoon chicken bouillon granules
1/2 teaspoon dill weed
1/4 teaspoon curry powder
dash cayenne pepper
2 cups chicken broth
1 (12 ounce) can evaporated milk
3 cups mashed cooked acorn squash
salt and pepper to taste
5 bacon strips, cooked and crumbled

 
  • In a large saucepan, saute the onion and celery in butter. Stir in flour, bouillon, dill, curry and cayenne until blended. Gradually add broth and milk. Bring to a boil; cook and stir for 2 minutes. Add the squash, salt and pepper; heat through.
  • In a blender or food processor, process the soup in batches until smooth. Pour into bowls; garnish with bacon.

Friday, October 15, 2010

Smashed Rutabagas with Ginger-Roasted Pears

I pulled this recipe out of a magazine ages ago and it has become a regular side dish at our table!  I must admit that the kids aren't so fond of them, but any adult I serve it to usually goes back for seconds!!

Rutabagas are the larger, waxed root vegetable that you will find in the markets - the flesh is an orange colour.  Turnips are small (size of a beet), white with a purplish colour to one end.  The flesh of a turnip is white. These two are often mistaken for each other!

SMASHED RUTABAGAS WITH GINGER-ROASTED PEARS
Ingredients:
4lbs rutabagas, peeled and cut into 1" cubes
1 1/2 tbsp EVOO
1 tbsp fresh lemon juice
1 tbsp minced peeled fresh ginger
1 1/2 tsp granulated sugar
3 firm Anjou pears, peeled, cored and cut into 3/4" cubes
1/3 cup heavy whipping cream
5 tbsp butter
1 tbsp chopped fresh thyme
Kosher salt
Freshly ground black pepper
  • Boil rutabagas in a pot of boiling, salted water until tender (approx. 35 mins)
  • Meanwhile, preheat oven to 400F.  Line a large rimmed baking sheet with parchment paper.  Combine extra virgin olive oil (EVOO), lemon juice, ginger and sugar in a large bowl.  Add pears and toss to coat.  Spread evenly on the lined baking sheet and roast until tender, turning pears frequently, about 35 mins.  Remove from heat and set aside.
  • Drain rutabagas and return to the same pot.  Mash to a coarse puree.  Stir over medium heat until excess moisture evaporates, approx. 5 mins.  Add cream, butter, and thyme.  Mix in pears and any juices from the baking sheet.
  • Season with salt and pepper. ENJOY!
This dish can be made a day ahead and transferred to a microwave-safe bowl.  Cover and chill.  Bring to room temperature and rewarm at 1 minute intervals in the microwave, stirring often.

Tuesday, October 12, 2010

French Toast with Caramelized Bananas & Pecans

Although I am not a huge fan of French toast, my family definitely is and we had our friends Dave, Siobhan, and their kids staying over for Thanksgiving...so I chose this recipe from Canadian Living because it looked delicious and would feed a crowd at breakfast ~ we paired it with bacon and sausages and it was fantastic!!!

FRENCH TOAST WITH CARAMELIZED BANANAS & PECANS
Ingredients:
1/3 cup chopped pecans
6 eggs
1 1/2 cups 5% cream or milk
 2 tbsp pure maple syrup
1 tsp ground cinnamon
1 tsp pure vanilla extract
1/4 tsp salt
1 loaf of egg bread
2 tbsp butter
Bananas:
2 tbsp butter
6 firm peeled bananas, halved crosswise and lengthwise
1 cup pure maple syrup
1/2 cup packed brown sugar
  • On a baking sheet, toast pecans in 325F oven for approx. 6 mins.  Set aside.
  • In a large bowl, whisk together eggs, cream, maple syrup, cinnamon, vanilla, and salt.  Cut egg bread into 3/4" thick slices; dip into egg mixture until soaked.
  • In a large skillet, melt 1 tbsp butter over medium heat and cook the slices, in batches and adding more butter as needed, until golden, approx. 3 minutes.  Transfer to 2 rimmed cookie sheets.  Bake in the oven at 350F until puffed and heated through, approx. 8 mins. Place in a large 9" x 13" casserole dish, and set aside.
  • Caramelized Bananas:  Meanwhile, in a large nonstick skillet, melt half of the butter over medium high heat.  Fry half of the bananas, turning once, until golden and tender, approx. 3 mins.  Transfer to a plate and repeat with remaining bananas.
  • In the same skillet, bring maple syrup and brown sugar to a boil over medium-high heat; reduce heat and simmer for 2 mins.  Stir in bananas; simmer for 1 minute.
  • Spoon over the French toast and sprinkle with the pecans.
  • ENJOY!!

Saturday, October 9, 2010

Mum's Pork Sausage Stuffing

When it comes to turkey stuffing I have tried other recipes, but find myself returning to the stuffing that my Mum always made.  It's comforting and delicious!  In fact it's so good that my friend Dave who detests mushrooms, absolutely loves it!!

This will stuff a bird that is between 12 to 16lbs - if your bird is bigger, double the recipe.  If it doesn't all fit inside the cavity, put the extra stuffing into a couple of layers of cheesecloth, draw all the ends together and tie with kitchen twine to create a bag of stuffing.  Lay this in the roasting dish next to the bird and allow it to cook with the turkey and absorb all the lovely juices!!

MUM's PORK SAUSAGE STUFFING
Ingredients:
2 cups of quartered white button mushrooms
1 onion, finely diced
1 tube of pure pork sausage meat (you can find this in your grocer's freezer)
1 tbsp ground black pepper
1 tbsp dried parsley flakes
1 tsp ground sage
1 loaf of white bread
  • In a large skillet with fairly high sides, heat onion and sausage meat and saute until sausage is no longer pink.  Add the mushrooms and saute until the mushrooms cook down and the meat is crispy brown.
  • Meanwhile using a food processor or blender, make bread crumbs out of the loaf of white bread and place in a large bowl.  Season with the black pepper, parsley and sage.  Add the cooked sausage mixture and all the oil (although I am a fan of removing any excess fat from the skillet with most recipes, this one requires the fat to bind the meat and bread mixtures together - no one said this was healthy and frankly why we only have it at Thanksgiving and Christmas!!)
  • Combine the meat and bread mixtures well and let cool to room temperature before stuffing the bird.
  • Once the turkey is cooked, scoop out the stuffing and place in a separate bowl to enjoy!
*Although I love this with my turkey dinner, it is equally as nice cold and placed inside of a turkey sandwich!

Monday, October 4, 2010

Sun-Dried Tomato Meat Loaf

This is one of those comforting dishes that is easy to make, is delicious with a side of garlic mashed potatoes, or in between some crusty bread as a sandwich the next day! 
SUN-DRIED TOMATO MEATLOAF
Ingredients:
1 tbsp EVOO
1 1/2 cups thinly sliced shiitake mushroom caps or button mushrooms
1/2 cup minced onion
1 stalk celery, finely chopped
2 cloves garlic, minced
2 tbsp balsamic vinegar
1 egg, beaten
1/2 cup dried bread crumbs
1/3 cup chopped, drained, oil-packed sun-dried tomatoes
1/2 tsp dried thyme
1/4 tsp each salt and black pepper
1 lb lean ground beef or pork
Topping ~
4 tbsp chili sauce or ketchup
1 tbsp Dijon mustard
1/4 tsp dried thyme
  • In a skillet, heat oil over medium-high heat and saute mushrooms, onion, celery and garlic, stirring occasionally, until softened.  Approximately 5 minutes.  Stir in vinegar; reduce until evaporated, about 30 seconds, cool slightly.

  • Meanwhile, in a large bowl combine egg with bread crumbs, tomatoes, thyme, salt and pepper.  Mix in the mushroom mixture and ground beef or pork. 
  • Pack into a 1.5L loaf pan, mounding on top.


  • Topping ~ In a small bowl combine the chili sauce with the mustard and thyme.  Spread over the top of the meatloaf.


  • Place meatloaf into a 350F oven until a meat thermometer registers 170F (75C).  Approximately 45 to 50 minutes.  Let stand for 5 minutes upon removing from oven.  Slice and serve!

Blushing Apple Sauce

I have never made homemade apple sauce, but in my pursuit of eating as 'clean' as possible I attempted it this year.  The kids have been begging me to make my own for a while and after our excursion to "Siloam Orchards" where they grown heritage apples and use only organic sprays (and it is truly organic because for the first time in 12 years, Greg's been able to eat an apple without having to use his epi pen!), I decided to go for it!  I first went on to http://www.food.com/ where I tend to search for recipes and found one that called for apples, water and sugar...then my friend Moira Sanders gave me a signed copy of her newest cookbook "The Harrow Fair Cookbook: Prize-Winning Recipes Inspired by Canada's Favourite Country Fair" (http://www.theharrowfaircookbook.com/) and her maternal Grandfather's recipe for blushing applesauce was so simple I just had to try it - and it is delicious too!!


BLUSHING APPLE SAUCE
Ingredients:
12 large red-skinned apples
1/2 cup water


  • Wash the apples thoroughly.

  • Quarter the apples and remove the cores.  Roughly chop the apples and place them, and the water, in a large pot.  Cook over medium heat until the apples soften and become sauce - approx. 30 minutes.

  • Push the sauce through a strainer or food mill to remove the skins.

  • You can either preserve the sauce by canning them (I used 125mL jars and send one a day in each of my children's lunch pails), or placing in a container in the fridge, where it will store for a week or two, or in the freezer for up to 3 months!
THANKS MOIRA AND LORI!!!

Baked Farfalle with Prosciutto and Mushrooms

This is one of those comforting type of pasta dishes that can be frozen and reheated or just eaten immediately because it smells soooo good!  Personally I find there are fewer seductive savoury flavours than the combination of cremini mushrooms, whipping cream and prosciutto together!!!  Try this with a glass of crisp white wine and you'll know what I mean!

BAKED FARFALLE WITH PROSCIUTTO & MUSHROOMS
Ingredients:
1 tbsp EVOO
4 oz prosciutto, diced
1 onion, chopped
3 cloves garlic, minced
3 cups sliced cremini mushrooms (about 250g)
1 1/2 tsp dried basil
1/2 tsp black pepper
1/4 tsp salt
1/2 cup white wine
1 can (28 oz/796mL) of diced tomatoes
2 tbsp tomato paste
1/3 cup whipping cream
5 cups farfalle pasta (bow tie)
1/4 cup chopped fresh parsley
1/2 cup grated Parmesan Reggiano cheese

  • In a large skillet, heat oil over medium-high heat; saute prosciutto until golden, about 5 minutes.

  • Add onion, garlic, mushrooms, basil pepper & salt; saute until mushrooms are golden, about 8 minutes.  Add wine and boil until almost no liquid remains, about 1 minute.

  • Add tomatoes, stir in tomato paste and bring to a boil.  Reduce heat and simmer for 20 minutes.  Add cream; simmer until thickened (approx. 5 mins) *At this point you could cool the mixture for 1/2 hr and then refrigerate in an airtight container for 24 hrs if you want to make ahead*

  • In a large pot of boiling, salted water, cook farfalle until tender but firm, approx. 10 minutes.  Drain and return to pot.  Add sauce and parsley; toss to coat.

  • Transfer to a 2.5L baking dish, sprinkle with Parmesan Reggiano and bake for 30 minutes, or until bubbly, in a 375F oven.

  • ENJOY!!

Trinidadian-Style Chicken

I created this dish a while ago and then when I went searching on my blog for the recipe, I realized that I never posted it - and that is a HUGE oversight because this dish is packed with flavour and definitely one I want to repeat!  The recipe comes from "Everyday Exotic" which is hosted by Chef Mooking.

TRINIDADIAN-STYLE CHICKEN
Ingredients:
Amise marinade ~
1 bunch green onions, chopped
2 shallots, roughly chopped
6 cloves garlic, chopped
1 bunch parsley, leaves & stems, roughly chopped
1/2 cup vegetable oil
Trini Style Chicken with Plantain ~
1 whole chicken, cut into pieces
Amise Marinade (above)
1 cup sugar
1/4 cup vegetable oil
1/2 white onion, small dice
1 green chili, sliced in half lengthwise (optional, but worth it!)
1 semi-soft plantain cut in half, lengthwise and chopped
4 plum tomatoes, chopped
1/4 cup Worcestershire sauce
1/2 cup chicken stock
1 cup cilantro, leaves picked off stems
Salt
Pickled Topping ~
1/2 cup white wine vinegar
1/4 cup water
1/2 stick cinnamon
1 shallot, sliced in 1/4" pieces
2 jalapenos, seeded and sliced in 1/4" pieces
1 tbsp sugar
Salt

  • Amise Marinade ~ Place all ingredients in a food processor and puree.  Place in a large bowl or container, and set aside.

  • Trini-Style Chicken with Plantain ~ Marinate chicken in 1/2 Amise Marinade for a maximum of 24 hours.

  • In a large skillet, heat sugar and vegetable oil over medium high heat.  Swirl until sugar caramelizes and turns brown, approx. 7 to 10 minutes.

  • Add chicken, skin side down.   Allow chicken to brown on all sides, approx. 5 minutes.  Add onions, chili, plantain, tomato and Worcestershire sauce.  Stir.

  • Add chicken stock and bring to a boil.  Add the remaining 1/2 of the Amise Marinade, stir and reduce to medium heat.

  • Cook for 30 to 40 minutes, season with salt and remove from heat. 

  • Garnish with cilantro and pickled topping before serving!

  • Pickled Topping ~ In a small pot, heat white wine vinegar, water and cinnamon stick.  Bring to a boil.

  • Add shallot, jalapeno and sugar, remove from heat.

  • Season with salt, hold in vinegar for 10 minutes.  Discard cinnamon stick and strain liquid, reserving pickled shallots and jalapenos.
*Plantains look similar to bananas, but are larger and generally darker in colour (sometimes a deep brown - which means they're ripe!)

Wednesday, September 29, 2010

Easy Chicken Noodle Soup

My children have embraced chicken noodle soup with great gusto since the weather has become more autumnal...lucky for them that we have poultry a-plenty due to the fact we belong to the poultry share at "Cooper's CSA Farm & Maze"!!  I roasted one of their delicious free-range, pasture raised, hormone and antibiotic free chickens for dinner one day, stripped the carcass and used the bones for making stock (see below on how to do this!), and used some of the meat for this delicious soup that only takes 30 minutes to create!

CHICKEN NOODLE SOUP
Ingredients:
4 cups water
3 cups homemade chicken broth (or the best low sodium store bought)
1 1/2 cups cubed, cooked chicken
3/4 cup cubed celery
3/4 cup cubed carrots
1 small onion, diced
1 1/2 tsp dried parsley flakes
1/4 tsp black pepper
3 cups uncooked egg noodles (I used wide ones, but the matchstick work beautifully too)

  • In a large pot or Dutch oven, combine the first 8 ingredients.  Bring to a boil.  Reduce heat; cover and simmer for 10 minutes or until vegetables are crisp-tender.  Stir in noodles; cook 5 to 7 minutes longer or until noodles and vegetables are tender.

  • ENJOY!
*If you feel that your soup is not 'chicken-y' enough, you could add 1 tsp of sodium-reduced chicken bouillon granules to the pot, however if you're using a homemade stock the flavour should be just fine!

HOMEMADE POULTRY STOCK
Ingredients:
8 cups water
2 3/4 lbs (1.375 kg) of turkey or chicken carcass, wings, legs
1 rib celery, roughly chopped
1 onion, skin on, roughly chopped
2 cloves garlic, peeled and mashed
1 tsp each of Kosher salt and black peppercorns
2 bay leaves
  • In a large stockpot or Dutch oven, bring water, carcass, celery, onion, garlic, salt, peppercorns, and bay leaves to a boil; reduce heat and simmer until reduced to approximately 6 cups.  This will take about an hour.
  • Strain and skim off foam.
  • Store in an airtight container in the fridge for a week, or freeze in cubes and then store in a ziploc bag in the freezer for a couple of months!


Toad - In - The - Hole with Onion Gravy

The kids were intrigued by the name of this traditional British dish, so I decided that since we had wild boar sausages in the freezer from "Cooper's CSA Farm & Maze", that I would recreate this dish!  It was delicious and really simple!
TOAD-IN-THE-HOLE with ONION GRAVY
Ingredients:
EVOO
 8 large good-quality sausages (mine were honey-garlic wild boar)
 2 large red onions, peeled and sliced
2 cloves of garlic, peeled and finely sliced
2 tbsp of butter
6 tbsp balsamic vinegar
1 tbsp good-quality vegetable stock powder or 1 vegetable stock cube
Batter:
1 1/2 cups milk
1/2 cup all-purpose flour
Pinch of salt
3 eggs

  •  Put just under ½ " of oil into a loaf pan, then place this on the middle shelf of your oven at 475ºF.  Place a larger tray underneath it to catch any oil that overflows from the pan while cooking. When the oil is very hot, add your sausages. Keep your eye on them and allow them to colour until lightly golden. 
  • Take the pan out of the oven, being very careful, and pour your batter over the sausages.  It will bubble instantly.  Carefully place the pan back in the oven for at least 20 minutes, to allow the Yorkshire puddings to rise. Do not open the oven door!  Remove from the oven when golden and crisp.
  •  Onion Gravy:  Saute the onions and garlic in the butter on a medium heat for approximately 5 minutes, or until they are translucent. Add the balsamic vinegar and allow it to reduce down by half. Add a stock cube or the stock powder.  Sprinkle this in and add 1 tbsp of water. Allow to simmer and you'll have a really tasty onion gravy! 

Tuesday, September 28, 2010

Chicken and Black Bean Burritos

This is a fantastic recipe that is so easy to pack and freeze - it was a regular dish in our house when we had a 2 year old and a newborn in the house!  Now I make these as a convenient go-to dinner when all inspiration fails me (and I know that these 'freezer treats' aren't packed with preservatives, sodium and other things that I can't pronounce!)

CHICKEN AND BLACK BEAN BURRITOS
Ingredients:
1 tbsp EVOO
1 onion, chopped
2 cloves garlic, minced
1/4 tsp each salt and pepper
4 boneless, skinless chicken breasts, cubed
1 jalapeno pepper, seeded and minced
1 sweet red bell pepper, chopped
1 can (19 oz/540 mL) of black beans, drained and rinsed
1 cup salsa
8 large whole wheat or flax soft tortillas
2 1/2 cups shredded Cheddar or Monterey Jack cheese
1/2 cup light sour cream
  • In a skillet, heat oil over medium-high heat; fry onion, garlic, salt and pepper until softened, about 3 minutes.  Add chicken, jalapeno, red pepper, beans and salsa; cook, stirring, until chicken is no longer pink inside.  Approx. 10 minutes.  Let cool.
  • Spoon about 3/4 cup of the filling down the centre of each tortilla; sprinkle each with 1/4 cup of the cheese. 
  • Fold in bottom edge, then sides; roll up.  Place, seam side down, in a greased 13" x 9" glass baking dish.  Sprinkle remaining cheese over top.
  • Bake in a 400F oven until golden and hot, and cheese is melted, about 15 minutes.  Serve with sour cream.
*Freezing Instructions:  After sprinkling with remaining cheese, let unbaked burritos cool for 30 minutes.  Refrigerate until cold.  Cover and overwrap with heavy-duty foil (or wrap individually in heavy-duty foil) and freeze for up to 1 month.  Bake from frozen, loosely covered with foil in 400F oven until golden and hot, and cheese is melted.  Approx. 25 minutes.

Wednesday, September 22, 2010

Our Own Oktoberfest Meal!!

Wild boar sausages on a bun with sauerkraut, mustard and German beer...
it's almost time for Oktoberfest!!!

 Greg and I were talking about Oktoberfest the other night and that turned my thoughts to the awesome selection of sausages and beers that him and I experienced when in Germany...so I decided to recreate the meal one night to much applause from my family!

I went over to "Cooper's CSA Farm & Maze" and purchased a package of the amazing wild boar sausages that they sell!!  Honey garlic for the kids and regular for us, grilled on the BBQ!  Heaping amounts of sauerkraut and mustard (honey mustard for the kids and HOT for us!) all on a panini bun and topped off with some German wheat beer (sans beer for the kiddies!!) and we had a fabulous meal!!!  YUM!

Homemade Chicken Tenders

I created this large serving dish of tenders from only
four chicken breasts - economical, easy and
ingredients you don't need a science degree to
pronounce or understand!
The kids had friends over last night for a playdate and some dinner - I thought that my homemade chicken tenders would be perfect for dinner...and judging by how quickly the kids gobbled them up, they were!  These are so simple that usually my 7 year-old son, Devon, makes these himself and I simply slice the chicken breasts and put them in the oven for him! 
We originally got this recipe from the Canadian Living television show "Best Recipes Ever" and the sauce that she suggested is also great - so I have included that also in case you want a change from plum sauce or ketchup in your household!!

HOMEMADE CHICKEN TENDERS
Ingredients:
4 boneless, skinless chicken breasts sliced into 'fingers'
1 egg
1 tbsp cold water
1 cup dry bread crumbs
1 tbsp chopped fresh coriander or 1/2 tsp dried basil
1 tsp cajun seasoning
1/4 tsp onion salt

  •  In shallow bowl, whisk egg with cold water. In another shallow bowl, combine bread crumbs, coriander, Cajun seasoning and salt. Dip chicken strips into egg mixture, then into bread crumb mixture to coat all over.
  • Arrange chicken on greased rimmed baking sheet. Bake in 400°F (200°C) oven until golden and no longer pink inside, about 15 minutes.

  PEANUT PEACH SAUCE
Ingredients: 
1/4 cup apple juice or cider
1/4 cup smooth peanut butter
 2 tbsp peach or aprict jam
 1 clove garlic, minced
1-1/2 tsp cider vinegar

 
  • In microwaveable bowl, combine apple juice, peanut butter, apricot jam, garlic and vinegar; cover and microwave at Medium-High (70%) for 2 minutes or until blended and warm, stirring once.
  • Serve warm with chicken strips for dipping.


Tuesday, September 21, 2010

Baby Boy 8" x 8" Scrapbook!

This is a photo of Meghan at 6 mos -
I used adobe photoshop to convert it to
black & white and used film grain to
create a 'texture' to the photo!  The
 clock signifies the waiting that every
pregnant woman experiences!
My brother-in-law and his wife, Meghan, are expecting a baby boy in early November!! They've chosen the name Simon and the baby shower was this past weekend. The one requirement was that instead of a card, we write a message to Meghan, Geoff and the baby on a book that they can read together. I decided to make my own book that they can share and created an 8"x8" scrapbook of pre-made pages for them to place their favourite photos in! (and I made a card because I LOVE making cards!!) Here's a picture of it!


Please bear with me because I am not overly confident with posting more than one photo at a time (and there are quite a few because I included one of each page and the card!!), but I feel they're definitely worth a look!  For some reason I loaded them in order, but they got mixed up?!  Enjoy!


I visualized a beautiful black and white photo of our newborn nephew on this page!  I used a silver stamp pad on the edges of the navy star and then elevated each star with foam squares.  The title is a double layer of navy lettering with silver on top!


This is the cover page and on the back of each of these pages, since Meghan isn't a scrapbooker, I put a sticky note with a drawing of the page and where I thought pictures would look nice on each!


I thought a beautiful photo of Simon in the hospital with his Mum and Dad, could go on this page!!                                                                             

I love the primary coloured blocks of paper on this page!

I titled this page "On The Move" so that they could place photos of Simon in his car seat or stroller on this page
I think this is one of my favourite pages of the whole album - the colours just speak to me!  Hopefully this is where a picture of all of us with the new baby will be placed!
I remember feeding time being a messy time as both of my kids 'explored' what was in their bowls or mouths!  I attempted to capture this memory with the splatters!!

Just a fun page where perhaps they could have a photo of Simon when he first arrives home and everything is new to both him and to his parents!

Obviously I made this page with a photo of both India and Devon with Simon, in mind!!  The "o" in Cousins is a blue heart-shaped brad and the squares are just scraps of paper put together in a way that reminded me of a quilt!

A 'manly' page celebrating Father's Day - the blue square brads in the top left corner spell D-A-D.  A metal heart elevated off the page with foam squares and a strip of coordinating ribbon down the left side, completes the page!

Another one of the holidays that Simon will experience in his first year - Valentine's Day!
I created this fun & vibrant page so Meghan can add a photo of Simon at a playgroup or with some of his little friends!  The yellow tag is held in place with a brad that's a blue arrow - all the children's names who are in the photo with Simon can be listed on this tag!
It's always lovely to head outdoors and go for an autumnal hike, pick apples, or choose a pumpkin at a local farm - this page was created with that sort of activity in mind!
I placed this page after the Valentine's Day page with an Easter Bunny theme!  It could also include a small photo of some other springtime activity such as going to a sugar shack for maple syrup, or looking at the spring flowers.
Of course there always needs to be a page for Mother's Day!  As this page is opposite the one for Father's Day, I chose papers that have polka-dots for both! 
Summertime is always a time for playing on the beach - I thought it might be nice to have a page where Geoff and Meghan can put a photo of Simon at the cottage on the dock, in the boat or playing on the beach!
The very last page in the album is one celebrating Simon's first birthday!!
Don't know if Simon will be dressing up for Halloween, but this could also include a picture of visiting a u-pick pumpkin patch or him beside a jack-o-lantern!  The ghost has purple eyes so I found a square of coordinating paper and then elevated it off the page with foam squares so it looks like it's floating!
There's nothing sweeter than a photo of a little baby fast asleep!  I used silver lettering to make the title 'quieter' and the silver star is elevated off the page using foam squares.
Thanksgiving is always a nice time of year when all the family gets together - in 2011 we'll be thankful for this new addition to our family!  The photo square in the middle is held in place by the two photo corners.  I punched out a leaf in the top left corner and added a yellow piece of paper in behind to make it stand out and then some buttons finish it off!
Nothing cuter than a baby new year!  I hope Geoff and Meghan get him a little top hat to complete the look! 
Just a fun playful page to display a photo of Simon with some of his favourite toys!
Simon will only be a month and a half old when St. Nick comes to visit, but I hope they have a photo of him curled up on Santa's lap for this page!!
Bath time was always a fun time in our house and I have many photos of India and Devon sporting shampoo horns and mohawks in the tub!!  Just a page devoted to splishy-splashy fun!